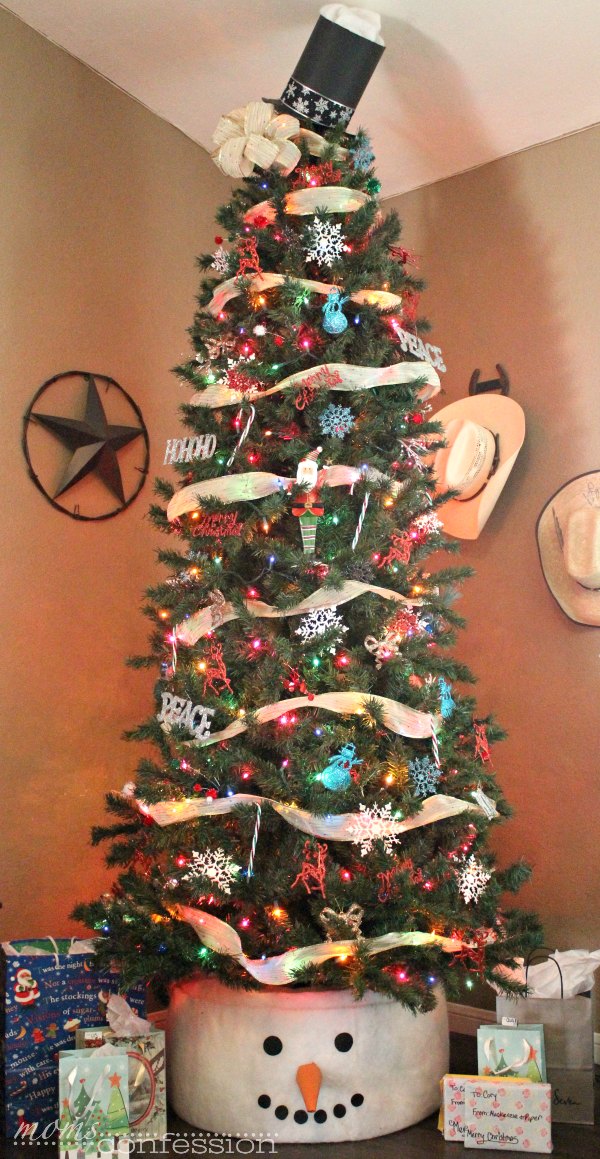
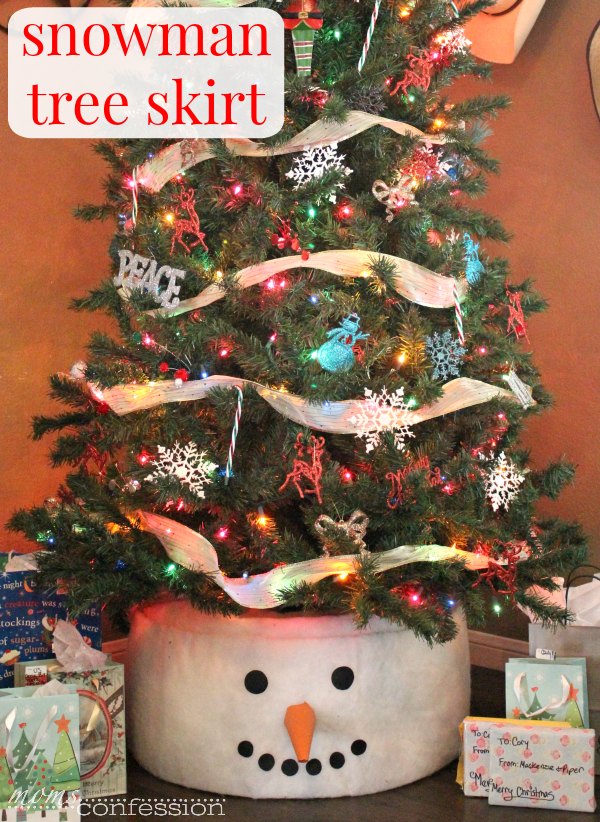
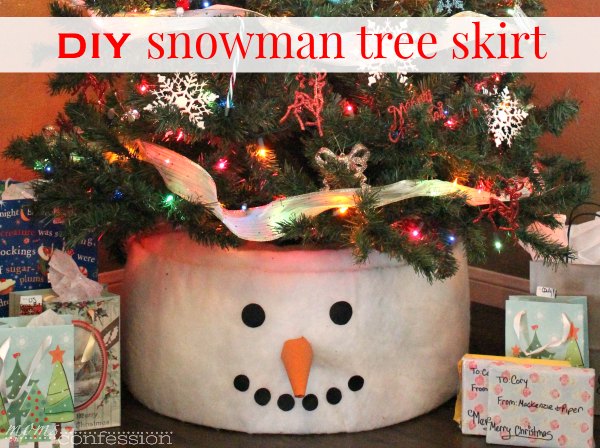
The Cutest DIY Snowman Tree Skirt for Christmas
The other day I was skimming through my Facebook feed to see what my friends were up to. You know that random 5 minutes of time that you find to do something…non-productive. Yeah…that!
During those 5 minutes, I saw that one of my friends pinned this really cute Washtub Tree Skirt by ISaveAtoZ and it caught my eye instantly. I immediately went over to check it out and was SO INSPIRED! (Yes that totally deserved all caps)!

See why this Washtub Tree Skirt is SO INSPIRING? It’s adorable and super cute too!
I’ve had a washtub lying around the house for years, BUT of course, the tree stand was too big. BOO! Instead of just copying what my friend did, I used it as my inspiration piece to make a Snowman Tree Skirt. Just like Jennifer, I don’t like my tree skirt…it’s plain, blah, and even more blah. We have used it for years simply because I haven’t made a new one or been inspired enough to make something super cute.
Usually, my tree is up and fully decorated on Black Friday, but we were out of town on a much-needed family vacation over Thanksgiving so my tree had to wait. :( On Cyber Monday, I had the kids help me pull everything down from the attic and I got busy crafting my own tree skirt. I think he’s (yes my tree is officially a boy too) cute and thought you might like some inspiration if you haven’t put your tree up yet for the holidays. If you have already decorated your tree for this year, go ahead and pin this snowman tree skirt for next year’s Christmas decorations or if you are like me…you are totally going to find a way to make this Christmas craft this year…even if it means taking the tree down! (Yes, I would totally do that! :))
Ok enough with my rambling…let me show you what you need to make this cute Snowman Tree Skirt!
Snowman Tree Skirt
Snowman Tree Skirt Materials
12 gauge Aluminum Wire (2 – 24 inch rings and 8 – 14 inch straight pieces)
1 Roll of Quilt Batting
Small Piece of Black Vinyl (or black construction paper works too)
One 1 inch wide Washer
One 1 1/2-2 inch wide Washer
Foam Floral Cone (found mine at Dollar Tree)
1 sheet of orange scrapbook or construction paper
Total Time: 1 hour
How to Make A Snowman Tree Skirt
- Cut about 48 inches of wire from your spool of aluminum wire.
- On one end, bend about 1/2 inch in to bend a small loop closure.
- Take the remaining wire and form a ring that’s approximately 24 inches round.
- Once the ring is formed, put the straight end of the wire into the small loop you created in step 2 to close the circle form together. Set these aside for now.
- Now take the eight pieces that are straight and do the same as step 2 on both sides, but don’t fully close them around to the wire. Make them more of a “u” shape. Repeat this process for each of these and make sure that the “u” shapes are both going the same direction on the same side.
- Once you have completed, lay one of the 24-inch ring on the ground, table, or wherever you are working on this project. Hook one of the straight pieces onto the ring and pinch the end closed.
- Add each of the pieces onto the base ring, making sure to space them out approximately every 5-6 inches or so.
- Once you have all the pieces attached to the base ring, now you can add the top ring and attach the other end of the “u” shaped pieces. You should now have the base of your snowman complete.
- Lay out the quilt batting on a table. It should the shape of a rectangle. Cut approximately 20-24 inches off the shorter side (which would be the head or foot of a quilt – not the side). Set the remainder of the quilt batting aside (you will need it later).
- Now go back to your base with the piece of quilt batting you trimmed off and place it under the base ring.
- Roll the other side over the top and place a dab of glue to close the pieces together. Secure the batting all the way around the ring. Your snowman should look like “3” in the picture below. Trim off the excess quilt batting and set it aside.
- To create your snowman’s nose, cut approximately 2 1/2 inches off from the base of the cone form. Lay your orange scrapbook or construction paper on a table, counter, etc. Place the tip of the foam cone on one corner at an angle and roll the scrapbook paper around it like a tube. Place a piece of tape or dab of glue to secure the paper around the tube and trim the excess paper away from the base. Next, pinch the tip of the nose to form a tip.
- Grad the black vinyl or construction paper and lay it out on the table. Take the larger washer and trace around the edge twice. Do the same with the smaller washer and trace eight circles. Cut the circles out.
- Now you can glue all the pieces onto your snowman to create his face…isn’t he the cutest? :)
- Place your tree in the stand and grab the remainder of the quilt batting that you set aside in step 9. Stuff inside the ring of the snowman skirt and fluff to fill the space.
- Have fun decorating your tree!

Additional Materials Needed
Glue Gun
Glue Sticks for glue gun
Elmers Glue or Glue Stick
Scissors
Tape (optional)
Wire Cutters
Sharp Knife
And this is the finished Snowman Tree Skirt!!
Get the printable instructions to make this snowman tree skirt below.
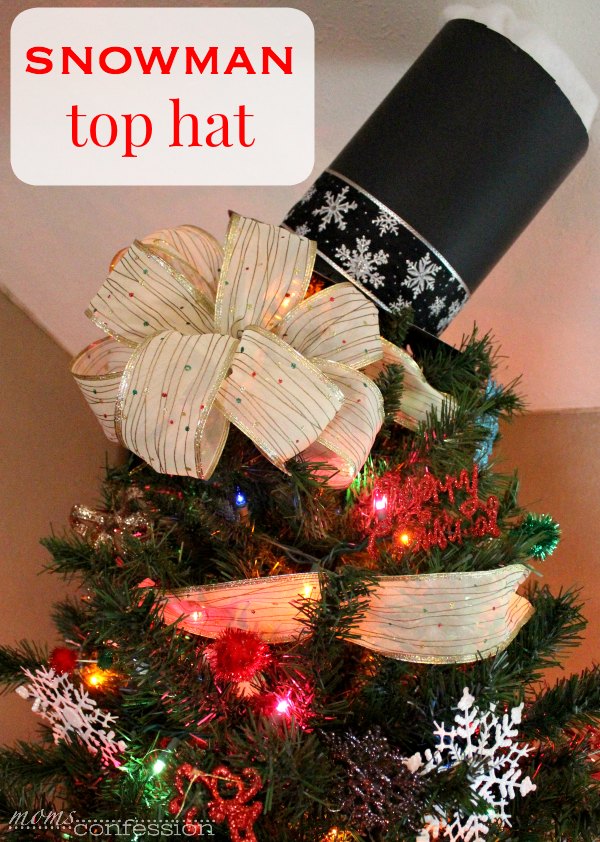
Finish your Snowman Tree off with this Snowman Tree Topper!
Be sure to pin this for later!

DIY Snowman Tree Skirt for Christmas
Equipment
- Glue Gun
- Glue Sticks for glue gun
- Elmers Glue or Glue Stick
- Scissors
- Tape (optional)
- Wire Cutters
Materials
- 12 gauge Aluminum Wire 2 – 24 inch rings and 8 – 14 inch straight pieces
- 1 Roll of Quilt Batting
- Small Piece of Black Vinyl or black construction paper works too
- One 1 inch wide Washer
- One 1 1/2-2 inch wide Washer
- Foam Floral Cone found mine at Dollar Tree
- 1 sheet of orange scrapbook or construction paper
Instructions
- Cut about 48 inches of wire from your spool of aluminum wire.
- On one end, bend about 1/2 inch in to bend a small loop closure.
- Take the remaining wire and form a ring that’s approximately 24 inches round.
- Once the ring is formed, put the straight end of the wire into the small loop you created in step 2 to close the circle form together. Set these aside for now.
- Now take the eight pieces that are straight and do the same as step 2 on both sides, but don’t fully close them around to the wire. Make them more of a “u” shape. Repeat this process for each of these and make sure that the “u” shapes are both going the same direction on the same side.
- Once you have completed, lay one of the 24-inch ring on the ground, table, or wherever you are working on this project. Hook one of the straight pieces onto the ring and pinch the end closed.
- Add each of the pieces onto the base ring, making sure to space them out approximately every 5-6 inches or so.
- Once you have all the pieces attached to the base ring, now you can add the top ring and attach the other end of the “u” shaped pieces. You should now have the base of your snowman complete.
- Lay out the quilt batting on a table. It should the shape of a rectangle. Cut approximately 20-24 inches off the shorter side (which would be the head or foot of a quilt – not the side). Set the remainder of the quilt batting aside (you will need it later).
- Now go back to your base with the piece of quilt batting you trimmed off and place it under the base ring.
- Roll the other side over the top and place a dab of glue to close the pieces together. Secure the batting all the way around the ring. Your snowman should look like “3” in the picture below. Trim off the excess quilt batting and set it aside.
- To create your snowman’s nose, cut approximately 2 1/2 inches off from the base of the cone form. Lay your orange scrapbook or construction paper on a table, counter, etc. Place the tip of the foam cone on one corner at an angle and roll the scrapbook paper around it like a tube. Place a piece of tape or dab of glue to secure the paper around the tube and trim the excess paper away from the base. Next, pinch the tip of the nose to form a tip.
- Grad the black vinyl or construction paper and lay it out on the table. Take the larger washer and trace around the edge twice. Do the same with the smaller washer and trace eight circles. Cut the circles out.
- Now you can glue all the pieces onto your snowman to create his face…isn’t he the cutest? :)
- Place your tree in the stand and grab the remainder of the quilt batting that you set aside in step 9. Stuff inside the ring of the snowman skirt and fluff to fill the space.
- Have fun decorating your tree!
More Christmas Craft Ideas
The Cutest DIY Snowman Tree Skirt for Christmas
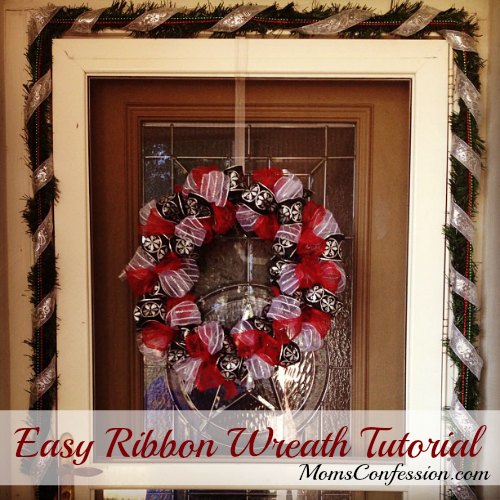
Easy Ribbon Wreath

Reindeer Deco Mesh Christmas Wreath